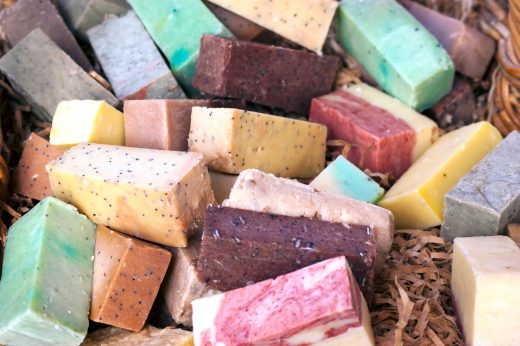
 One thing that many homesteaders often like to try is making their own soap. It is truly a lost art and a must if you love beautiful, fragrant, artisan style soaps. These fancier soaps can run up to $10 a bar in higher end shops. If however, your idea of soap is the stuff you can buy at the dollar store (raising a hand here) then this may be something less budget friendly but certainly fun and useful to try. They make great gifts during the holidays too!
There are two kinds of soaps you can venture into making. One is melt and pour soap which is exactly as it sounds. You buy a premade base made of things like goats milk, shea butter, or glycerin. The base is already ready to go, you simply melt it and then pour it onto smaller molds to make individual soaps. Cold processed soap requires some simple chemistry. You are mixing or saponifing lye and oil and the resulting chemical reaction is soap. This soap requires following some directions, being cautious with ingredients such as lye, and then also allowing time for your soap to cure. It is a lot of fun to make though and you may just find yourself with a new hobby.
Here the steps you can follow to make cold processed soap…
- Find a soap recipe online or in a recipe book or use a lye calculator to figure out the amount of lye you will need for your own recipe. Measure out all your ingredients using your safety gloves, safety glasses, and your digital kitchen scale.
- Add the lye to water very carefully to completely dissolve it. It can get VERY hot so use heat resistant tools.
- Let the mixture cool to about 100°F. Use a thermometer to track this.
- While the lye is cooling you can heat up any solid oils you are using to bring them to liquid form using a double boiler.
- Mix the cooled lye and oils when they are both the same temperature, 100°F. Slowly pour the lye/water into the oils while you stirring.
- Stir until you have a pudding consistency (called the trace stage). This means your soap has emulsified and this could be ten minutes or forty, depending on the recipe you are using. Check the consistency every five minutes.
- Once you have confirmed you are at the trace stage you can add coloring and essential oils for fragrance, mix well.
- Pour into prepared molds and wait for at least 24 hours before removing and cutting into finished sizes.
- Wait some more. The soap bars need to cure for 4-6 weeks. This allows excess water to evaporate and create the hard, long lasting bar of soap you are used to using. This time also creates a gentle bar of soap with lower pH than the alkali of raw soap batter. No one wants a super harsh soap or a slimy soap, so give it time.
- Enjoy your soap!!
Recommended Reading:


