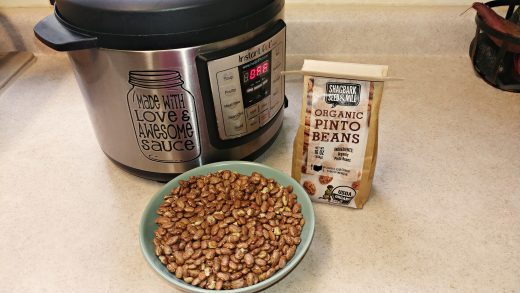
 When it comes to starting seeds indoors, providing the right amount of warmth and consistent moisture is crucial for successful germination. While warming mats are a popular choice, have you ever considered using your Instant Pot? It tends to be a little faster…dare I say almost “instant”? This versatile kitchen appliance can serve as a cost-effective and efficient alternative, ensuring your seedlings receive the growing conditions they need to thrive. In this blog post, we’ll explore how to harness the power of your Instant Pot for indoor seed starting.
The idea is the same as sprouting seeds with a paper towel and plastic bag, its just a bit more attractive to use your Instant Pot as a little greenhouse!
- The Instant Pot’s Versatility: Instant Pots are renowned for their versatility in the kitchen, I adore mine and use it 2-3 times per week. How else can a hearty dinner on the table in 10-20 minutes with minimal work or mess? But their usefulness doesn’t stop there. By repurposing this multifunctional appliance, you can create a warm and controlled environment for your seeds to sprout. With its precise temperature settings and ability to generate gentle heat, the Instant Pot provides an ideal solution for starting seeds indoors.
- Gather Your Supplies: To get started, gather the following supplies: an Instant Pot with a yogurt or fermentation setting, seed-starting trays or containers, seed-starting mix, seeds of your choice, water, and a clear plastic cover or plastic wrap. With these items in hand, you’re ready to embark on your indoor seed starting journey using the Instant Pot. If your device does not have a yogurt setting don’t despair, you can actually still make yogurt (or start seeds) without the button, just follow the steps in this post.
- Prepare the Seed-Starting Mix: Ensure your seeds have a healthy start by using a quality seed-starting mix. Fill your seed-starting trays or containers with the mix, moistening it lightly with water. The mix should be slightly damp but not overly wet. This ensures proper moisture retention and promotes successful germination. You can alternatively use a jute fabric mat that is soaked through rather than use soil or trays at all. Very easy!
- Sow Your Seeds: Following the instructions on your seed packets, sow your seeds at the appropriate depth in the prepared seed-starting mix. Place multiple seeds in each cell or container, as not all seeds may germinate. Gently press the seeds into the mix or the mat to ensure good contact.
- Set Up Your Instant Pot: To transform your Instant Pot into a mini greenhouse, pour about a cup of water into the inner pot. Place your seed-starting trays or containers on the steam rack, ensuring they are not submerged in water. Cover the Instant Pot with a clear plastic cover or plastic wrap, creating a humid environment for the seeds.
- Activate the Yogurt or Fermentation Setting: Now, it’s time to let your Instant Pot work its magic. Select the yogurt or fermentation setting, as it generates a gentle, consistent heat that promotes seed germination. Adjust the temperature according to the specific requirements of your seeds, typically between 70°F and 85°F (21°C and 29°C).
- Monitor and Maintain: Regularly check on your seeds to ensure they’re thriving. Keep the seed-starting mix moist by adding water to the Instant Pot as needed. The plastic cover or wrap will help retain moisture, creating a mini greenhouse effect. Maintain a suitable temperature and provide adequate ventilation by partially opening the cover or wrap when necessary.
By repurposing your Instant Pot, you can create an ideal environment for starting seeds indoors. With its precise temperature control and humidity retention capabilities, the Instant Pot offers an innovative alternative to traditional warming mats. Embrace this creative approach to seed starting and enjoy the satisfaction of watching your seeds sprout and thrive.
Recommended:
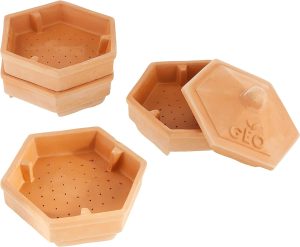
I love these tiered terra cotta sprouting trays to give you lots of sprouting space!


